|
Thank you to everyone who took the time to complete the 2019 Member Survey. In planning the direction of the club the board of directors decided to poll the members to get the sense of what works and what doesn’t. 34 of our 61 members completed the survey and all that responded will join or renew. Their responses clearly identified the most enjoyable elements of our activities and have given us indications on how we can do even better.
Below are some highlights, come to the meeting in January to dive deep into our plans for 2020. Homebrew Sharing: The beer sharing activity of our monthly meetings are clearly a big factor in their positive responses but they also indicated several improvements that we will incorporate in our future meetings. First change will be to set up two sharing stations. The comments about bar flies blocking will be minimized as access will allow not only for easier access to the brews but a less crowded space where members can seek out the brewers for evaluation and discussion of brews. Indeed, one of the stations might be stocked with beers for which the brewers seek evaluation and improvement comments. We will also do something about providing more prominent name tags to aid and encourage brewers to seek out those that provided the beers as well as introduce themselves to new members. On that point over 50% of new members come because of contact with current members at the meetings and at the Sterling Pig, often during our board meetings. BOMBing Runs: Only about 20% of our members actually participate in the Bombing Runs, but attending and tasting result in them being our best supported meetings. There are a number of detail meeting improvements identified to make these events even more successful. Brewery Bus Trips: Our trips are popular with about a third of our membership taking advantage, and again there are improvements identified to make them even more attractive. They are expensive to host as we must rent a bus and driver for the day. Also in the past they were considered a bonus for joining the club and we made them free to members. One of the negatives was we hired school busses for midsummer trips. Well A/C busses are even more expensive and in any case most members indicated they were prepared to pay for the trips. So given the enthusiasm and other constraints it was decided to host two bus trips, one in the Spring and another in the Fall. We also took the advice to reduce the number of breweries visited to three with lunch at the middle one. The Holiday Party: This was once again a smash success with those who attended, and lessons learned should allow us to further improve this year’s event. Brewing for Events: Something that the senior/experienced brewers in our club enjoy but it is not well supported by the members. Most commented on the limited time, limited scale to brew for donation and worrying about the quality of their beer. Some people (most members?) don’t keg. However there are a number of members who really enjoy these programs so we need to examine just how could make them work for them. Topics for Meetings: The members rated last year’s meeting presentations and rated possible topics for this year. This will be the basis for this year’s program. 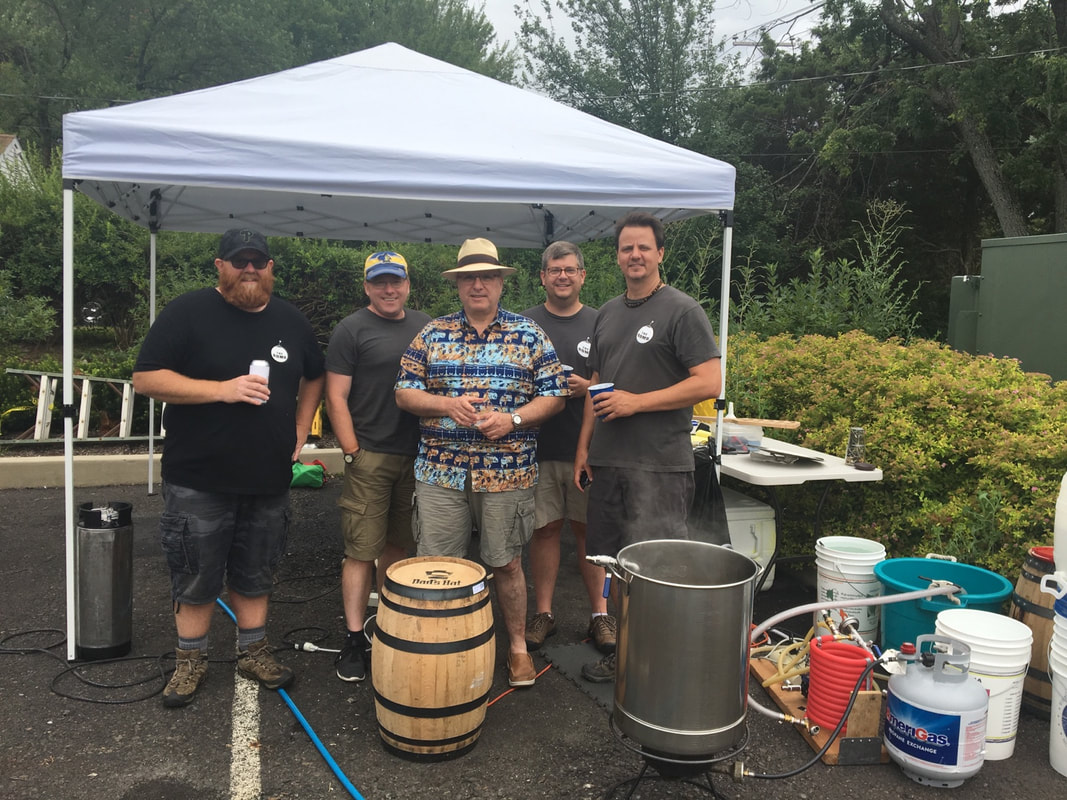 By: Sean Mellody and Dan Copper Last summer, on a sunny & warm July Saturday, four of our club members ventured up to Keystone Homebrew for their annual Club Barrel Brew Day. This is an annual event and has been taking place for over 10 years (I believe). This was one of the largest brew days yet for the event, with over 13 clubs represented from the Lehigh Valley and South Eastern Pennsylvania area. The competition consists of each participating homebrew club being given the free use of a freshly dumped barrel – thanks to Dad’s Hat Rye and Keystone Homebrew Supply. This year and last year’s event saw over twelve homebrew clubs fire up their brew systems and brew everything from ESB to Imperial Rye Porter all aged in a 15 gallon Dad’s Hat Rye Whiskey barrel. The small format barrels made it easier for more clubs to participate and for some, to age in multiple barrels and blend or choose the best later. This was our second year participating in the competition and one we plan to continue participating in as it is an important portion of the Keystone Cup. The Keystone Cup was established in 2008 to encourage a friendly but competitive relationship among regional homebrew clubs. Three competitions combine to make up the Keystone Cup: The War of the Worts, the Club Barrel Brew Championship, and Malt Madness. Participating clubs earn points for placing in the Club Barrel Brew Championship, and also when individual club members place in the War of the Worts or Malt Madness competitions (as long as they designated their club affiliation on their entry forms). It’s that simple! Over the years a few local club’s have dominated winning the Keystone Cup and we have decided it’s time to drop a BOMB on this and see if we can win. After last year’s first experience in the Barrel Brew Competition, where we brewed an ESB – we learned a lot. We also were able to gauge the competition and plan accordingly. We decided we needed to brew a more complex beer, that would stand out against the rest and showcase our talent as a club. To fill the 15 gallon barrel, we decide to brew 20 gallons of beer in total, 15 which would get barrel aged and 5 that would be kettle soured and fermented separately to allow us to blend to achieve the best results after aging in the barrel. But – I’m getting ahead of myself…back to the brewday… Dan Copper, Tim Downey, Mike Kinsley and Sean Mellody all took part in the brew day, with Sean and Dan bringing their systems up to Keystone to brew the beer. After much debate, we landed on brewing a sour porter which we would add fresh cherries to and age in the Dad’s Hat Barrel. We would primary ferment outside the barrel then age in the barrel and we would house it all at Dan’s house (aka DC Brewery). Brewday went off without a hitch, well – minus not hitting our planned numbers entirely, but oddly enough both batches hit the same OG so we were fine. (Details here are a whole other blog post on recipe formulation.) The freshly made wort was transferred to Dan's house where he aerated & pitched 3 packs of Imperial Darkness yeast into 15 gallons. Then took the remaining 5 gallons of wort and kettle soured for 3 days with Lactobacillus (goodbelly) after which time he pitched the last pouch of yeast (as well as 6lbs.of whole blackberry) to finish the sour portion. After primary fermentation, Dan took charge of transferring the beer into the barrel and onto 2.5 gallons (21lbs.) of fresh blackberry puree. Originally we planned on cherries, but we missed the window to get fresh cherries, so moved to fresh NJ blackberries. Thanks to Dan for processing all the berries and handling the beer in the barrel at his house. Fast forward 7 months – the beer was ready to blend. We had tasted it along the way to ensure it wasn’t getting bad or too strong and about 7 months in we decided it was ready. The original team reassembled at DC Brewery (aka Dan’s garage) and took to tasting the barrel version and non-barrel version of the beer. We decided to best replicate our tests, we would weigh each version and match that in the blend scaled to a 5 gallon keg. Math wasn’t our strong suit, and after a few samples it was getting hazy. We ended up on a 75% barrel vs 25% non-barrel blend for the final beer. We loved the beer and were excited to share at the competition and with our members. As we planned for our pouring at the competition, Dan came up with the name for the beer – Whoa Black Betty, inspired by the song by Ram Jam - that song is still stuck in my head. Being it is a porter with black berries and soured in a barrel, it is a perfect fit for the beer. When tasted it begins with the aroma of the rye barrel with hints of chocolate and blackberry. Once sipped, the fruit and sour hits you first, followed by more barrel oak, bread, caramel and chocolate. It is well balanced and many who tasted it at the competition agreed, it was not what they expected and they wanted more. The rest is a blur of the song on repeat, judges and other club members tasting and complimenting our beer, and us doing the same with their beer. There were many great beers to taste and the competition was tight, but we came in 2nd and beat out lots of great beers. Personally, I’m proud of taking 2nd and the showing we made at the event as a club. By taking 2nd we scored 10 points in the Keystone Cup, and while results and standings are not posted, I know this positions us well for the 3rd and final leg in August at Malt Madness. It was a great time brewing this beer and we look forward to doing another this summer. The remaining beer will be poured at Brandywine Valley Craft Brewers Festival and bottled to be shared with the members of the BOMB - with the brewers getting a personal allotment for their time and effort in brewing. If this is something you’d like to be a part of this year, let Sean or any board member know. by Sean Mellody 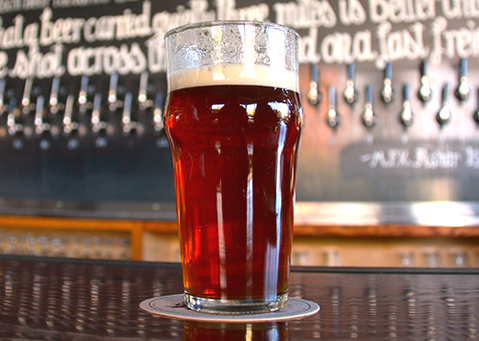  For this first run of the BOMBing Run in April we are trying something different, our first ever technical round. Inspired by my obsession with the British Baking Show and with the help from Eric at Brew Your Own Beer, we decided this year we'd change things up and have entrants all brew the same style but also the same recipe exactly, to see who can get it just right. Once our poll picked the styles, an Ordinary Bitter was the best option for the technical, as it's simple, easy to brew and is designed to have the brewer showcase their ability to follow a recipe, maintain a good fermentation and produce a low gravity, yet flavorful beer.
Technically speaking a bitter is simply a Pale Ale. They are at their core, session beers. The essence of a good bitter is the malt. The beer is meant to showcase the robust malt, balanced by simple english hop bitterness. If you're really looking for what defines this over a British Pale it is the hop aroma and bitterness. A Ordinary Bitter will be more ready and malt forward, versus a pale ale where the aroma is the star. According to All About Beer: Bitters are often pigeonholed into one of three different classifications based on original gravity and alcohol content, with a concomitant hop rate that puts them within a respective balance. The fairest of the lot is ordinary bitter. With an alcohol by volume (ABV) rating of less than 4 percent, ordinaries are perfect session beers. They are dark gold to copper in color and could be considered a summer beverage. With plenty of malt backbone to back up the hops, an ordinary bitter is proof that a beer need not be big to be beautiful. Hop rates run up to about 35 International Bittering Units (IBU). The middle wrung on the bitter ladder is occupied by special, or best, bitters. Less than 4.6 percent ABV, it is simply a strong version of an ordinary—still a session beer, a little more filling, and with a tad more malt character. Most of the bitters fall into this category. Up to 40 IBU helps offset the more lavish character of a best bitter. At the top of the hierarchy are extra special or strong bitters. They range from 4.6 to as much as 6 percent ABV and over 50 IBU. Still very quaffable, they generally have a stiff maltiness and some more complexity owing to the sheer increase in raw materials. Sometimes offered as a seasonal, these are very satisfying brews. For our BOMBing Run, we are focused on the Ordinary Bitter, for it's low abv and the ability to not hide behind hops for if your brewing technique or fermentation isn't just right you can't hide it and we'll know. My goal in this recipe was to keep it simple and aim for a soft malty, beer with a biscuity, nutty, or toasty quality. The key to a great Bitter is freshness. You want to serve this within 4-5 weeks of brewing for best results. The recipe is simple and easy to follow: Recipe Specifications - 5 Gallon All Grain -------------------------- Boil Size: 6.5 gal Post Boil Volume: 5.06 gal Batch Size (fermenter): 5.00 gal Bottling Volume: 4.75 gal Estimated OG: 1.042 SG Estimated Color: 9.1 SRM Estimated IBU: 25 IBUs Brewhouse Efficiency: 75.00 % Est Mash Efficiency: 70.5 % Boil Time: 60 Minutes Grain: 90% - 6 lbs 12oz Maris Otter 14.6% - 12oz Crystal 80 Hops: Boil: 60min - 1.00 oz Fuggle [4.5 %] Boil: 60min - .5 oz East Kent Golding [5.00 %] Boil: 15min - 1 Whirlfloc Tablets Yeast: 1 package Dry Lallemand London ESB Mash: Sacch rest - 60 min @ 152 F Sparge: Fly Sparge 4 gallons of 168f Misc: 30 seconds of pure O2 before pitching yeast. by Dave Harding A bit more than two years ago my experienced brewer grandson gave me a Northern Brewer kit. We brewed the first batch on “my wife’s” kitchen stove and made a mess, so that was out for future brews. So found a way to turn one of my basement workshops into my brewery. In the early days I routinely did gas welding there, but over the years I have accumulated a good deal of flammable materials, so I am no longer comfortable using open flames. So gas powered brewing was out of the question. A while back we decided to move the laundry upstairs so I was able to add that space as another workshop. This one has a big laundry tub still intact. Also when I remodeled it into the workshop I removed the 220 volt service but added several 20 Amp 110 volt lines for the power tools. This is now my brewery. I have developed a way to brew with two separate 1350 watt immersion heaters with one on a digital temperature controller; it works great and I have done almost forty 5 gallon brews, and found it to be almost as quick as the propane approach. The last brew from start to a sealed fermenter took about 2 ½ hours. Here is the process Member Mike Black gave me the water treatment formula from an earlier club lecture; (Table below). Since I have Chester Water the source is from the Octoraro Watershed and this is the base for which the lecturer provided the desired treatment. Don’t know his objective treated water so I hope we get the lecturer to return again this year and maybe we will learn how to produce a variety of brew waters appropriate to the beer style we are brewing. 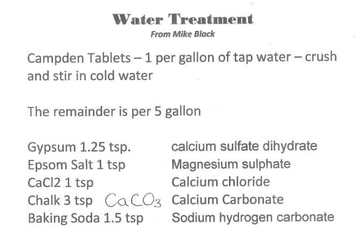 My method is to fill the brew kettle with 2 ½ gallons and two one gallon milk jugs of water for the final addition. I put the chemicals into one of the jugs and half fill it with water. Once mixed I put half into the brew kettle then share the remainder with the other milk bottle. Both bottles are then filled and, particularly in the summer when the domestic cold water is warmer, I put them in the refrigerator. This allows me to cut off the wort cooling at a higher temperature but still allow the final wort to be at the ideal fermenting temperature. 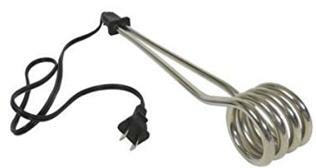 Building the Electric Brewing System If you wish to try electric heating you will find it quite inexpensive but there are a few important things to know. The $14 1350 watt 110 volt immersion heaters I use were bought from Amazon. There are two key attributes for this unit, it is 13 inches long so reaches from the rim to the bottom of the brew kettle and the second is the plastic end is molded and sealed around the heating elements. Make ABSOLUTELY sure the one you buy does not have a bolted end like the one on the right. I tried one and found if wort is splashed into the joint you will get a surprising flash and popped circuit breaker! These 1350 watt 110 volt units will work fine on a normal house circuit, but two of them on the same circuit will cause an overload and pop the circuit breaker. So simply connect them to two different circuits; you may have to use an extension cord for one of them. For temperature measurement and control I have set up a daughter outlet with a controller that can be plugged into a normal circuit. The controller is an Ink Bird unit also available from Amazon for $16. 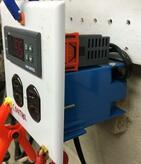 It can control heating or cooling. Of course in addition to controlling the brewing process it can control a fermenting heating blanket to match the yeast best temperature setting. I mounted mine on an outlet box then connected the wires with an extension cord input then output wired to the output sockets. The arrangement is shown on the right and the wiring diagram comes with the unit.  I also used the controller to lager my Bombing Run Lager. Not having a refrigerator in my brewery, and not planning to brew a lot of lager I made an ice box with an upper station for ice and lower chamber to lager the brew. A computer fan connected upper to lower and was controlled by the controller to keep the lower chamber at the right temperature.
So why not give it a try, ask me to help. |